My friend Ginny asked me to make kilt cookies for a bridal shower and I'm so glad she did because I love a cookie challenge and I love baking for friends. The wedding dress cookies I made are also for Ginny and each of her guests will get one of each to take home.
It did take some time for me figure out how to create a plaid design on a cookie — At first I thought I could just pipe the lines but I then decided that method would look too bulky and not very realistic. And, it would be very hard to pipe the lines thin enough and I was worried about smearing.
I also knew that I wanted the design to lay flat on the cookie, so my solution was to paint on the plaid using thinned royal icing and a very small brush.
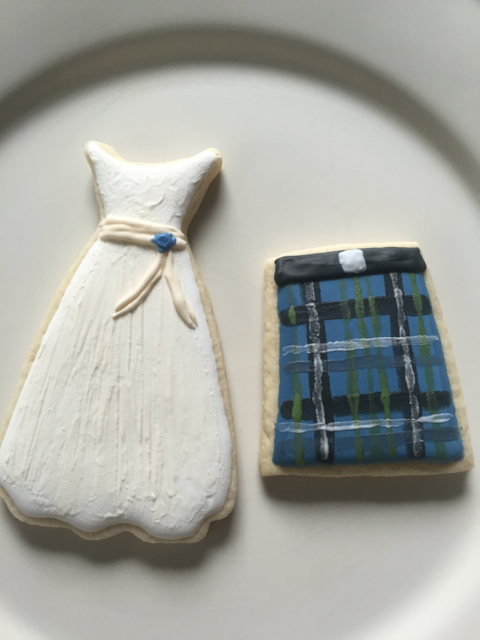 |
| Each of Ginny's guests will get an individually wrapped wedding dress and kilt cookie to take home. |
Here's how I made them:
 |
| I used a 4-inch square cutter to cut the cookies and then trimmed the edges to make a trapezoid. |
 |
| Cookies ready for the oven. |
 |
| After baking, I outlined a cookie using flood consistency blue icing and a #2 tip. |
 |
| And, I immediately filled in the cookie using the same icing and tip. |
 |
| I used a scribe tool to evenly distribute the icing and gave the cookie a gentle shake to help the icing settle. |
 |
| Once all of the cookies are outlined and filled, set them aside to dry completely. I let them dry overnight. |
 |
| After the cookies have dried, paint on four lines of black using tinted and thinned royal icing and a small brush. Periodically clean off your brush by dipping it in water and patting it dry with a paper towel. Remember to make the lines perpendicular and not parallel to the sides of the cookie. |
 |
| Once all of the cookies have the black lines added, mix up some thinned green royal icing and get ready to paint. |
 |
| Add a line down the center. |
 |
| Add a line on each side of the center line and a line outside of each of the black vertical lines. |
 |
| Keep working until all of the cookies have five lines of green. |
 |
| I then mixed up some thinned dark blue icing and added two horizontal lines on each side of the bottom black horizontal line. Do this to all of the cookies and let them dry completely. |
 |
| Once the cookies are dry, it's time to add a final touch to the plaid. Paint white lines using thinned royal icing on top of the black vertical lines and add two horizontal lines above each of the dark blue lines. |
 |
| Now it's time for a belt. Pipe two lines of medium consistency royal icing using a #2 tip. |
 |
| Add more lines to fill it in. I purposely didn't use a scribe tool to manipulate the icing to flatten it since I wanted a textured look to the belt. |
 |
| Add a belt to all of the cookies and let that dry. |
 |
| Now for the very last step, using thinned white icing and a small brush, paint a buckle on the center of the belt. Let the cookies dry completely before packaging or serving. |


No comments:
Post a Comment