The snowmen on these cookies were piped freehand onto an iced and dry base cookie.
I like cookie designs that don't require the purchase of a special cutter. I chose to use a plaque cutter for these but a simple round or square would work well too.
Because they were made freehand, every single snowman is a little bit different which I think makes them interesting and injects them with some personality. I got a kick out of piping their stick arms in different poses.
These cookies were decorated in four steps and need drying time in between. They aren't hard to make, they just take some time.
Here's how:
 |
| Outline and flood a cookie with light blue icing and then immediately pipe on some white dots for snow. Set the cookie aside to dry completely. Keep working until all of your cookies have this base coat. |
 |
| Once your base coats are dry, pipe on a snowman with medium consistency white icing. Use your scribe tool or a skewer to move the icing to fill in the gaps and give the cookie a gentle shake to help the icing settle. |
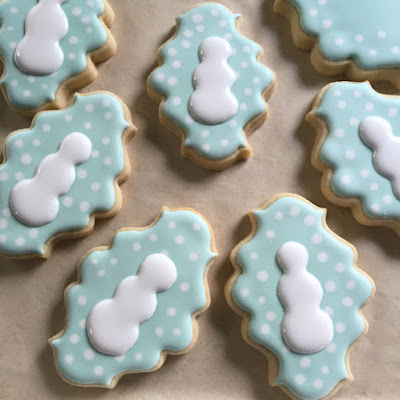 |
| Repeat until there is a snowman on every cookie and set them aside to dry completely. |
 |
| Once your cookies are dry, pipe on three dots of piping consistency icing and have a small food safe brush ready to use. (I apologize for the bad lighting, I was working late into the night.) |
 |
| With the brush, spread the icing neatly out to the edges of the snowman working in a circular motion so that it looks natural. Set the cookies aside to dry completely. |
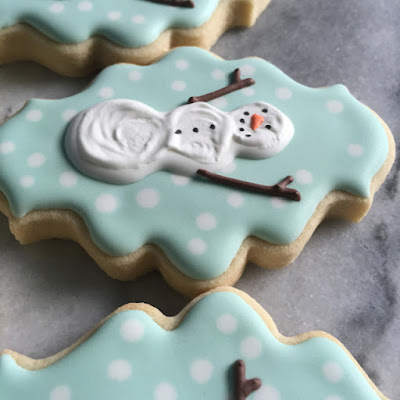 |
| The final step is to use a black edible ink marker to add eyes, a mouth and buttons. Also, with piping consistency brown and orange royal icing add the arms and carrot nose. For the nose, I used my scribe tool to help manipulate the icing to a point. |
 |
| All done! |
 |
| Once the cookies are completely dry they can be packaged. I put each cookie into a self-sealing cellophane bag. |


